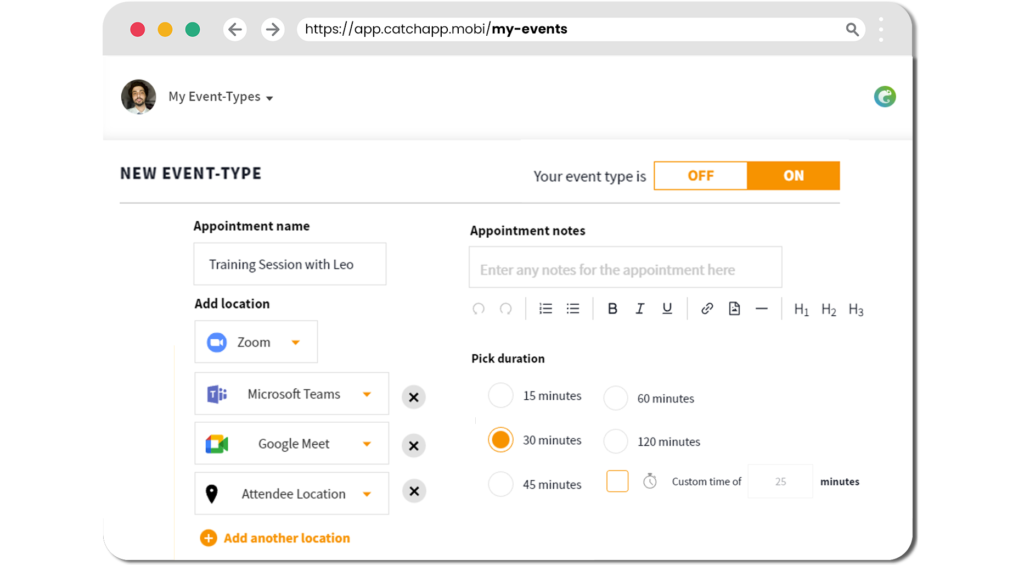
With CatchApp, you have the flexibility to customize and specify locations for your events beyond the default options. This feature allows you to add custom locations that align with your unique needs, ensuring accurate and personalized event information for your clients. In this article, we will guide you through the process of adding custom locations to your event types, empowering you to provide clear and specific details for each event and enhance the overall booking experience.
Adding Custom Locations to Your Event Types
You are able to customise

1) Log in to your CatchApp account.
2) Navigate to the “Event Types” section.
3) Select the desired event type.
4) Look for the “Location” field.
5) Click on “Add custom location” or a similar option.
6) Enter the name of the custom location.
7) Save your changes.
What can I do now?
Now that you have added custom locations to your event types, you can:
- Provide accurate and personalized event information to your clients.
- Ensure clear and specific details for each event.
- Enhance the booking experience by offering customized location options.
Outcomes for this…
By utilizing custom locations for your event types, you can expect the following outcomes:
- Improved clarity and accuracy in event details for your clients.
- Enhanced professionalism and personalization in your booking process.
- Increased client satisfaction through specific location options.
To take it to the next level:
- Fine-tune your availability
- Create and manage your events
- Add CatchApp Booking links to your Social Profile for quick, anytime access
Explore our Help Center for more ways to use CatchApp to make scheduling easier.
Have a question? If you have any questions, please reach out to our team by using our contact form. We’re available 24/7 and happy to help!

